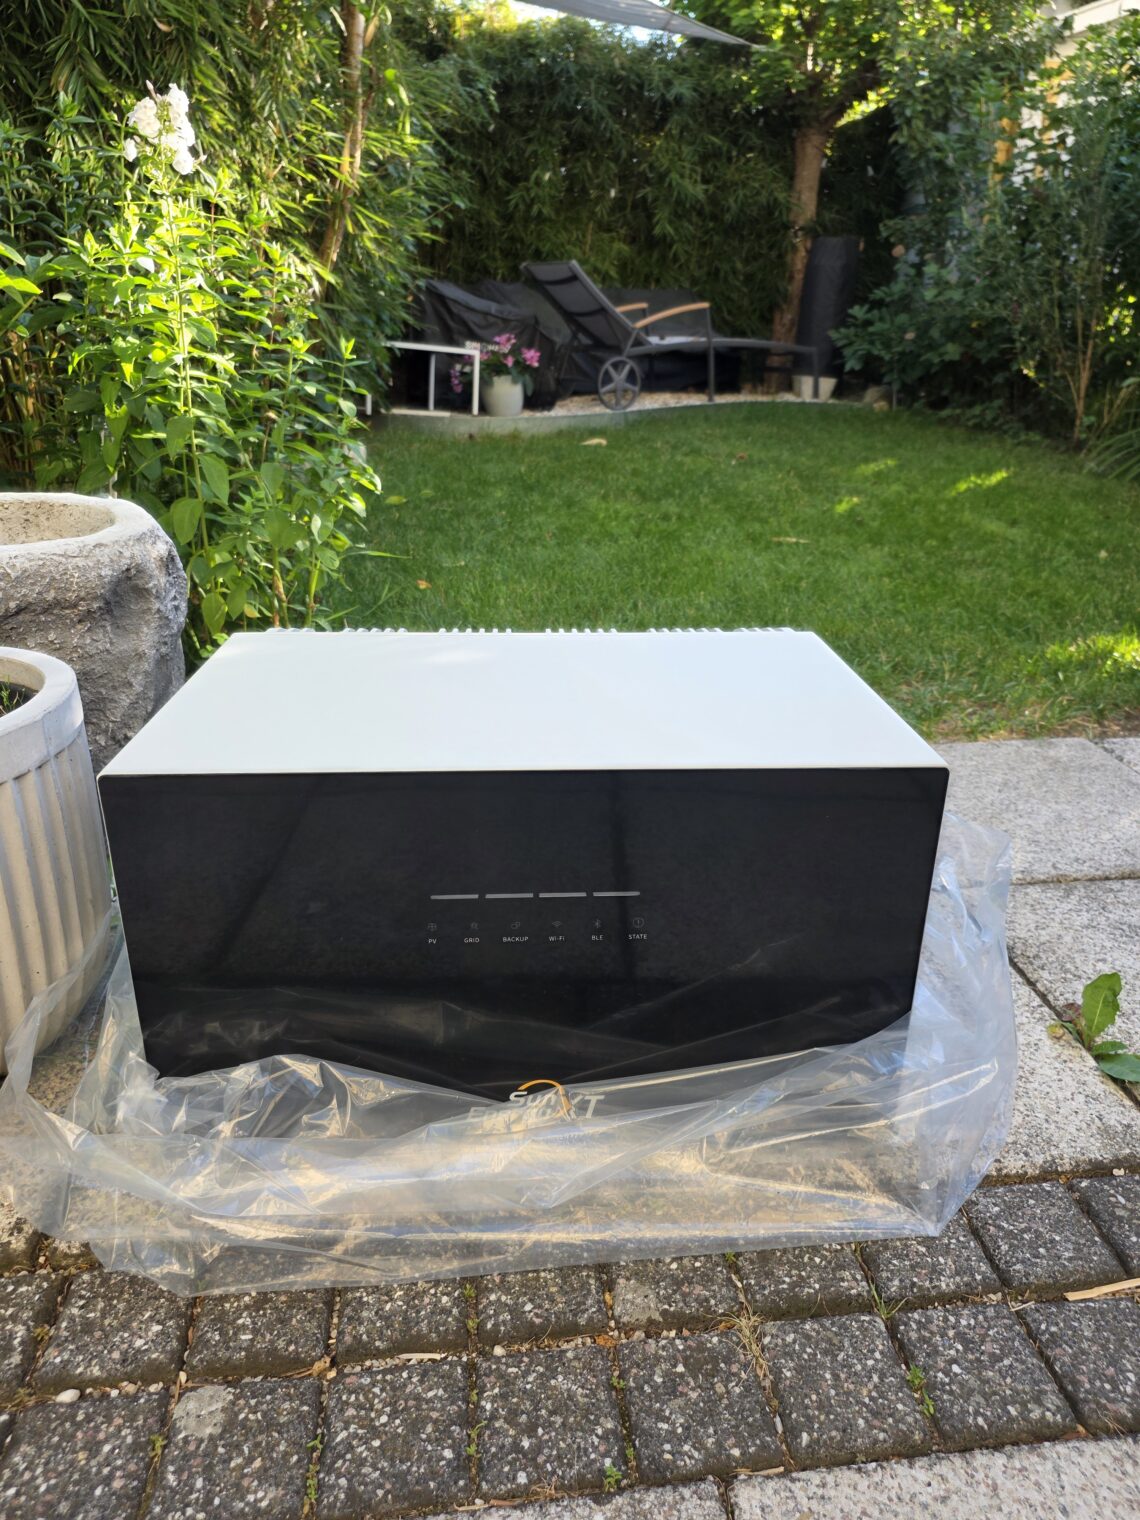
My First Experiences with the SunEnergyXT 500 PRO
While searching for a battery storage solution that could be expanded flexibly, handle the energy consumption of our four-person household, and support charging our electric vehicles, I came across the SunEnergyXT 500 PRO and was immediately impressed.
If you would like to know why, how my experience has been after the first three weeks, and what my setup looks like, keep reading.
Key Facts About My Setup
- 20 rooftop solar panels (8.9 kWp total)
- Huawei inverter
- Huawei EMMA energy management system
- Additional 3.2 kWp carport PV installation
- 3 × SunEnergyXT 500 PRO storage units
- 15 kWh total battery capacity
- Up to 7.2 kW AC charging and discharge power
Our Existing Setup
We operate a rooftop PV system with 20 solar panels, each rated at 445 watts, resulting in a total system size of 8.9 kWp. The system is powered by a Huawei inverter. However, we never installed a dedicated Huawei battery storage unit.
At the time, the decision was mainly driven by price. Since I had already started my solar journey with a balcony power station and battery storage before the rooftop system was installed, I was convinced that there would eventually be a suitable retrofit solution available.
We also have a Huawei wallbox installed in our carport, which allows us to charge our EVs using excess PV energy. The entire Huawei setup is managed by the Huawei EMMA HEMS system, installed inside the distribution panel. EMMA records energy consumption, grid import, and export.
As a Home Assistant user, my goal is to manage and monitor all smart devices from one central dashboard. Through integration with EMMA, our solar installation is also available in Home Assistant, allowing all relevant solar production and consumption data to be visualized and analyzed.
In addition, we have eight solar panels installed on our carport, providing another 3.2 kWp of peak generation capacity. This installation actually marked the beginning of our solar journey. It started as a small balcony power station, evolved into a larger stand-alone PV setup, and eventually led to the rooftop system.
As many solar enthusiasts know, once you’re infected with “solar fever,” the only cure is continuous expansion. More panels, more batteries, and more self-generated energy.
When it came time to expand our battery storage and increase both charging and discharge capacity, I ultimately chose the SunEnergyXT 500 PRO.
The SunEnergyXT 500 Series
Following the BK215+, the SunEnergyXT 500 Series is the company’s newest storage platform. The base unit already includes 5 kWh of battery capacity. Each main unit can be expanded with up to five additional 5 kWh battery modules, allowing a single tower to reach a total capacity of 30 kWh.
The system can be used in multiple ways. Like in my setup, it can function as an AC-coupled battery storage solution that complements an existing solar installation. Alternatively, it can connect directly to solar panels through its integrated hybrid inverter.
For direct PV operation, the system offers four independent MPPT trackers rated at 625 watts each. Every PRO unit delivers a maximum charging and discharging power of 2,400 watts.
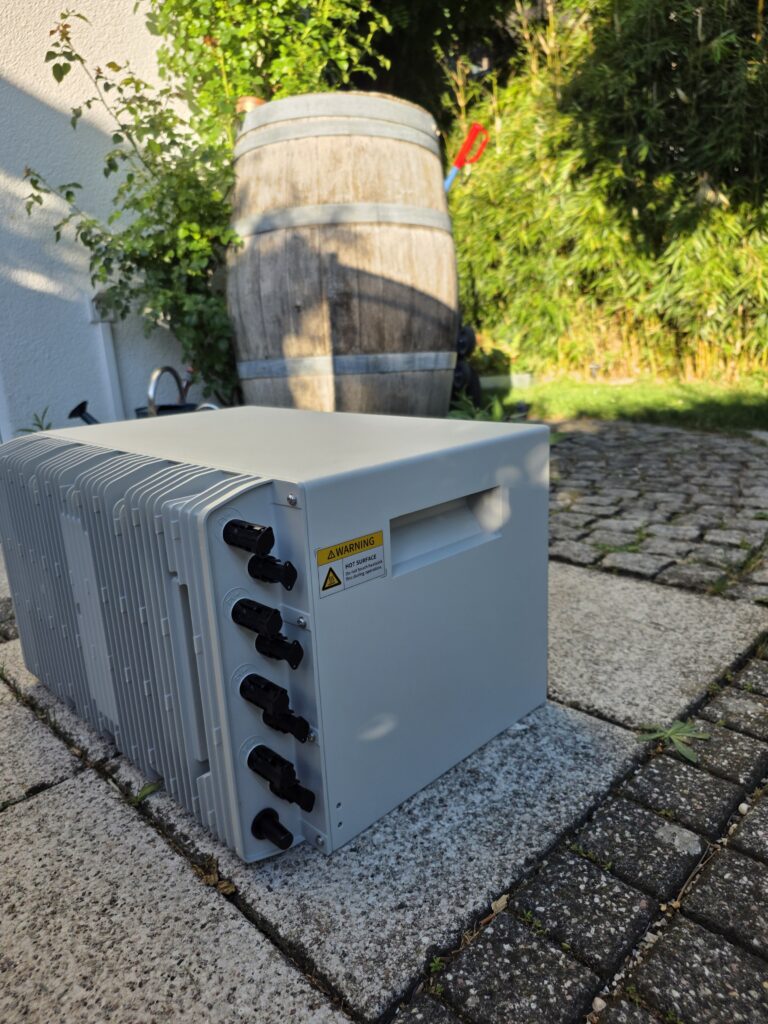
If you plan to use the 500 Series as a balcony solar storage system, you can choose the standard SunEnergyXT 500 instead of the PRO version. This model complies with legal output limits by restricting grid feed-in power to 800 watts.
Both versions include a dedicated 2,400-watt backup/off-grid outlet that can be used during outages or island-mode operation.
An interesting detail is that owners of the standard 500 model can later upgrade it for use in larger PV installations. According to SunEnergyXT, this can be enabled through an official activation process once a qualified electrician has inspected the installation.
This flexibility provides a strong level of future-proofing and investment protection. If you have specific questions about upgrading between models, I recommend contacting SunEnergyXT support directly.
Speaking of support, I had to contact them during the first days of my installation and was genuinely impressed by how quickly knowledgeable responses arrived. Even in situations where no immediate solution was available, I always received clear feedback and confirmation that the issue was being investigated.
One of the things that stood out most during my first weeks with the SunEnergyXT 500 PRO was the quality of customer support. Responses were fast, competent, and transparent.
My complete three-unit SunEnergyXT 500 PRO installation, CEE wiring, stacking system, smart multi-area strategy, and how I achieved up to 7.2 kW charging and discharge performance.
My Setup
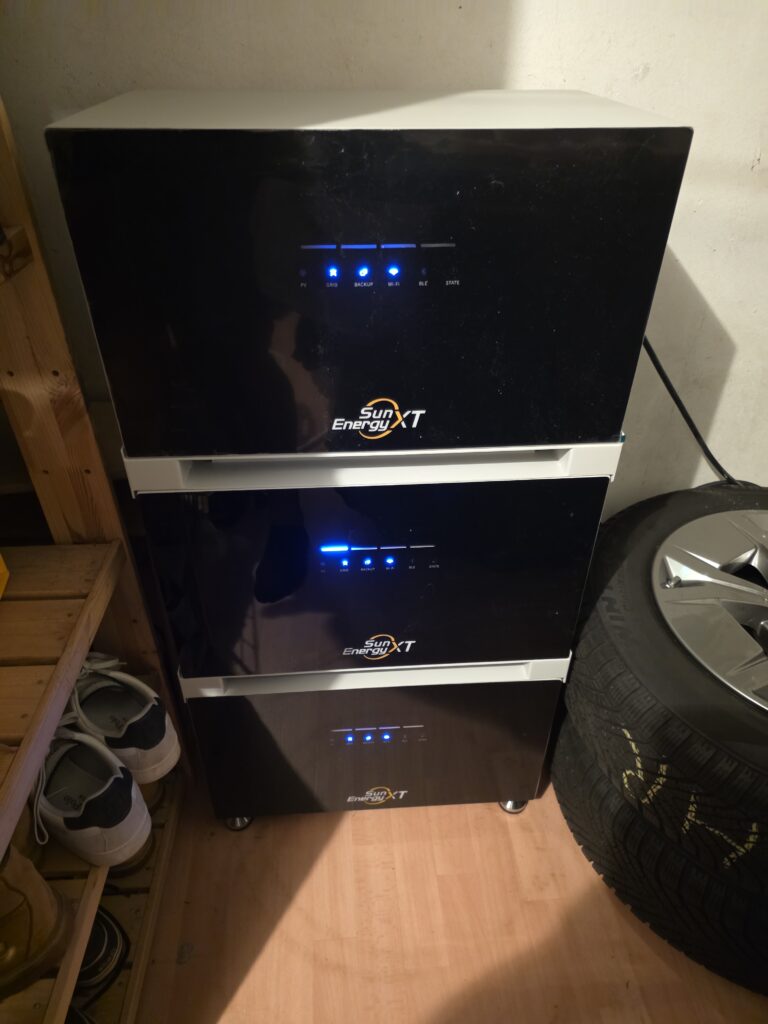
However, the expandability does not stop there. In my case, three SunEnergyXT 500 PRO units are now operating in the basement. They are connected through a special manufacturer-supplied cable to a CEE socket that was professionally installed by an electrician.
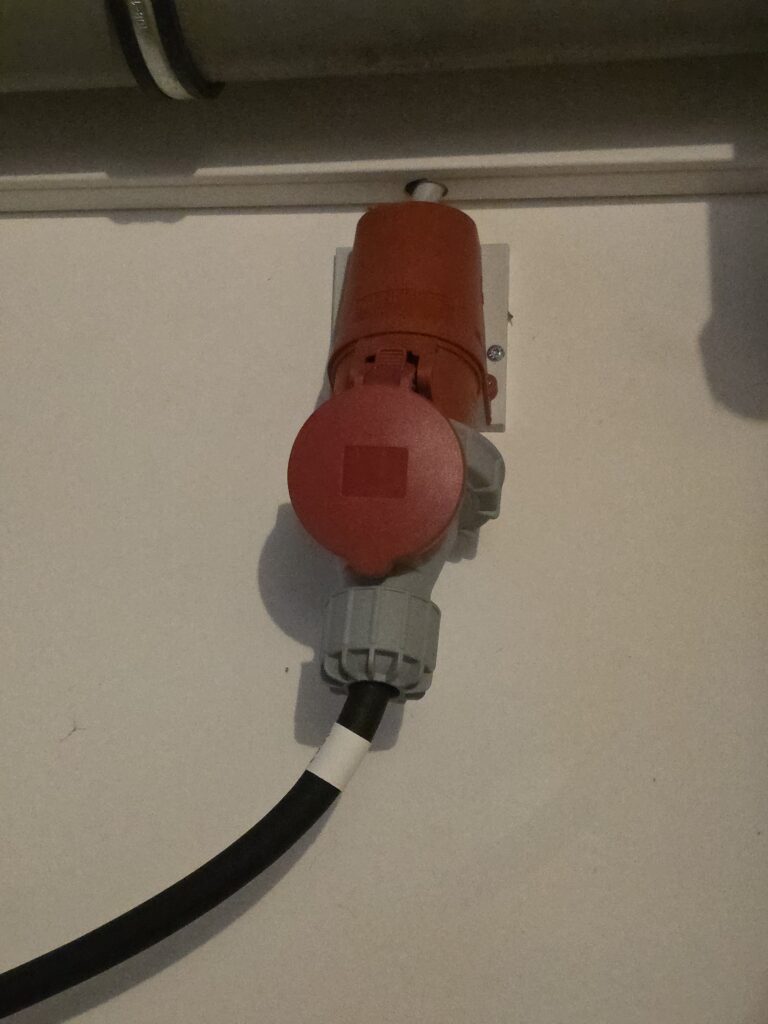
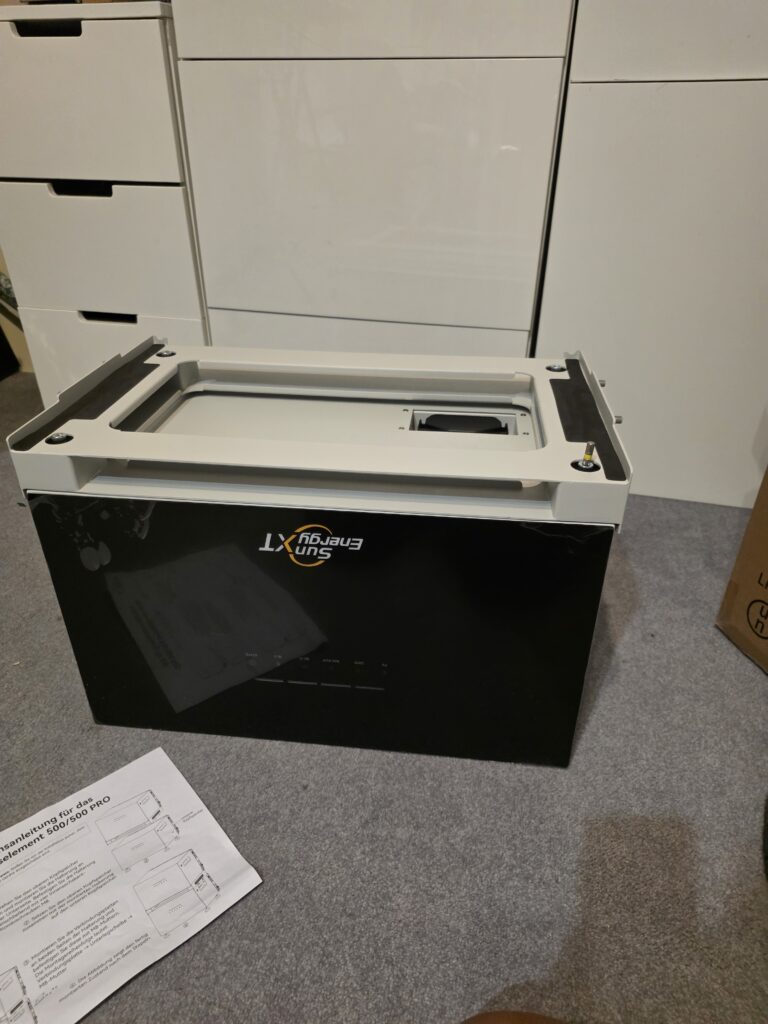
This allows all three units to operate as one combined system. To stack multiple units vertically, SunEnergyXT offers a dedicated mounting bracket as an accessory.
In the image below, you can see how I mounted the metal connector according to the installation guide before placing the upper unit onto the lower one.
The operating mode I use is called Smart Multi-Area Strategy.
With three PRO units combined, I achieve a maximum charging and discharge power of 7,200 watts. This ensures that under normal household usage, as well as while charging electric vehicles, very little energy is wasted and sufficient power is available to run high-consumption appliances without drawing electricity from the grid.
That starts early in the morning when various hair styling devices throughout the family are competing for power and extends to situations where a Thermomix, washing machine, oven, and EV charger are all running simultaneously.
And that’s before considering all the background loads such as routers, Wi-Fi access points, smart plugs, lighting, refrigerators, and countless power supplies.
Previously, two hair dryers running at the same time in the morning were often the ultimate power challenge. Thanks to the SunEnergyXT 500 PRO, that challenge has finally been solved, assuming sufficient battery capacity remains available.
Three SunEnergyXT 500 PRO units deliver up to 7.2 kW of AC charging and discharge power, enough to handle nearly all everyday household loads and EV charging scenarios.
Installation, Multi-Area Strategy and AC Coupling
The setup process was surprisingly straightforward.
Step 1: Install the App
Install the SunEnergyXT app, create an account, and sign in.
Step 2: Connect a Compatible Smart Meter
The first configuration step is linking a compatible smart meter. In my setup I use a Shelly Pro 3EM.
A small tip: Since I had already been using the Shelly before installing the storage system, I was initially unable to add it directly inside the SunEnergyXT app. After temporarily reactivating the internal Wi-Fi access point within the Shelly app, the setup worked immediately.
At the time of writing, compatible devices include the Shelly 3EM, Shelly Pro EM-50, bitShake, and EcoTracker smart meters.
Step 3: Create Individual Areas
To use multiple storage units within the Smart Multi-Area Strategy, each unit must be assigned to its own area. In my configuration, I named these areas Basement 1, Basement 2, and Basement 3.
You can create additional areas through the “Manage Areas” menu in the app. During initial setup, Bluetooth is used to establish the connection. Afterwards, the storage system is connected to your Wi-Fi network.
A stable Wi-Fi signal is essential. Make sure sufficient network coverage is available where the units are installed. The smart meter itself only needs to be configured once within a single area.
Step 4: Configure the Smart Multi-Area Strategy
Next, switch to the Strategy section of the app. In my case, the app automatically suggested the exact configuration I wanted: Smart Multi-Area Strategy combined with AC Coupling.
When creating the multi-area configuration, ensure that every area containing a storage unit is selected.
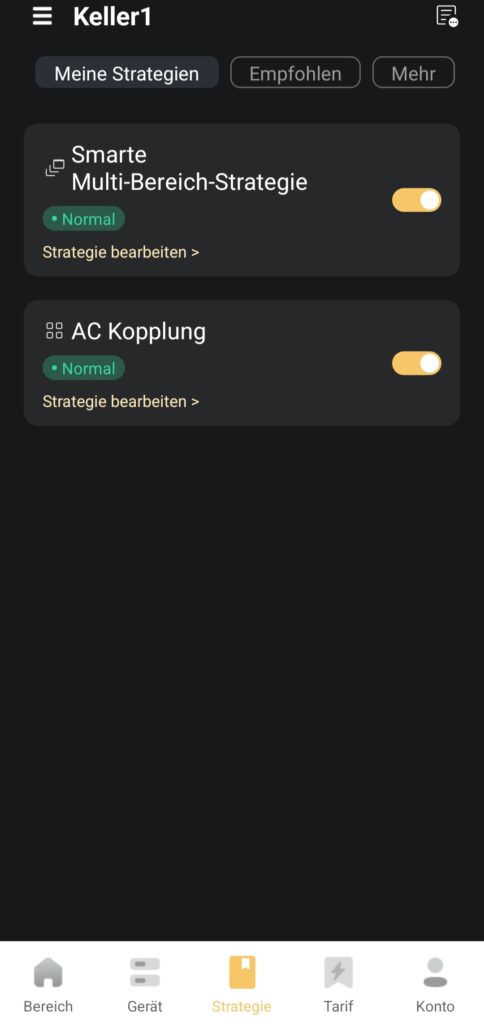
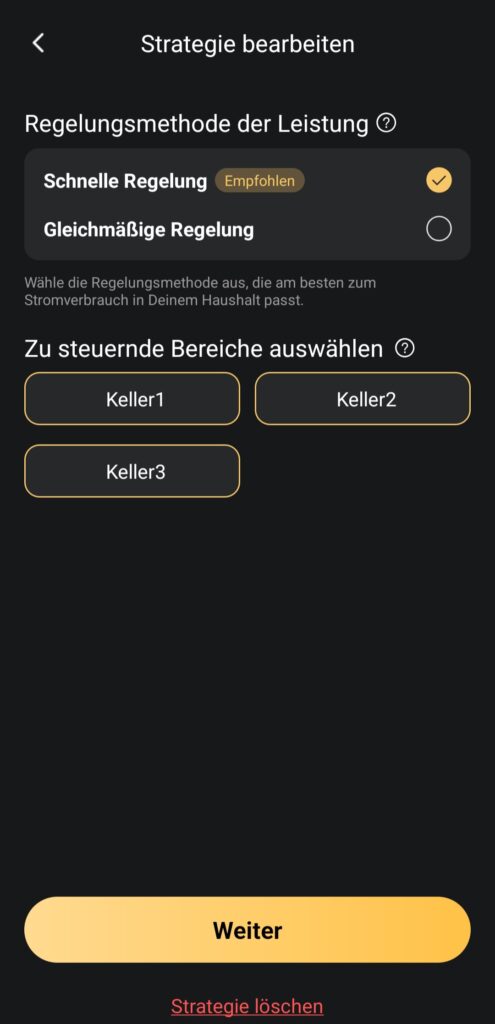
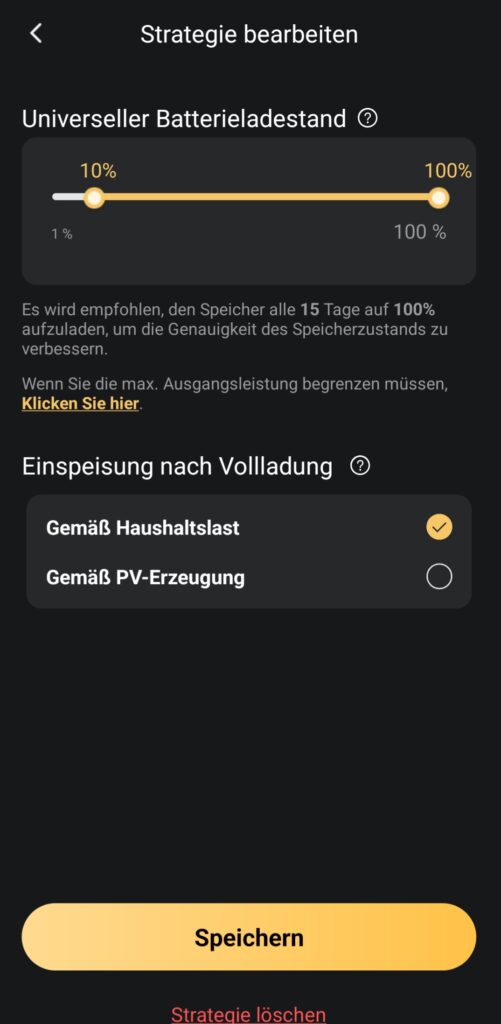
You can then define the minimum and maximum battery charge levels across all areas.
One important tip: if you expand the system gradually, verify the maximum output power setting afterwards. I started with two units and added a third later. While the additional area was successfully added to the strategy, the maximum output power was not automatically adjusted and had to be manually increased to 7,200 watts.
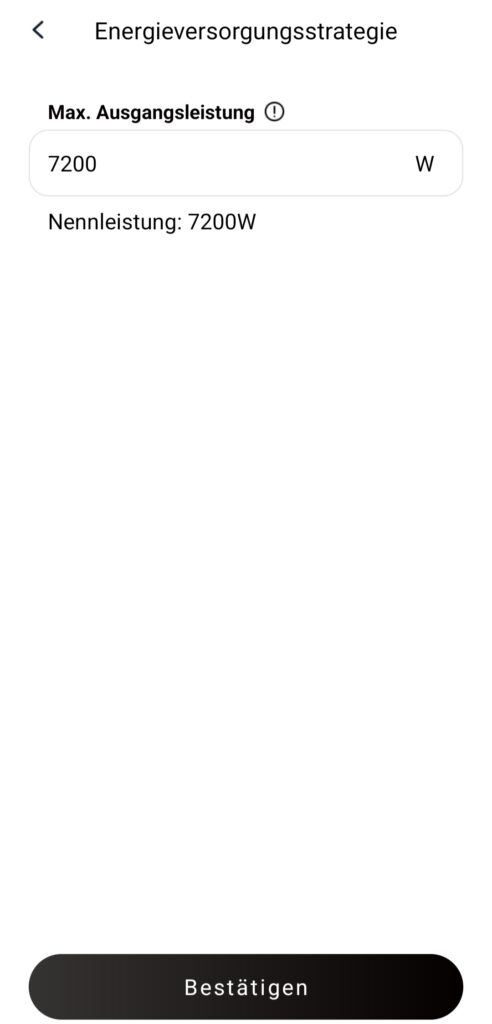
Special thanks to the support team here. Their response was incredibly fast and helpful.
Step 5: Configure AC Coupling
The final step is configuring AC Coupling if, like me, you plan to charge the batteries using surplus solar energy from an existing PV installation.
Select all relevant areas and configure the maximum charging power for each storage unit. I assume direct PV connection through the integrated MPPT inputs is equally simple, but I cannot provide real-world experience with that setup at this point.

And that’s it. The system is now ready to operate.
I am currently considering equipping my carport PV installation with a dedicated SunEnergyXT system as well. That would allow me to gain hands-on experience with the integrated inverter and direct solar panel connection.
Another idea currently on my roadmap is adding a second wallbox, or at least a traditional mobile charger, so that both of our EVs can charge simultaneously.
EV Charging with the SunEnergyXT 500 PRO
In combination with the SunEnergyXT 500 PRO, charging our electric vehicles has become significantly more convenient.
At the moment, I have configured our wallbox for a maximum charging power of 7.5 kW. This allows me to take advantage of virtually all available solar surplus energy without constantly switching between dedicated surplus charging mode and standard charging mode.
I simply plug in the vehicle, use as much solar surplus as available, and the SunEnergyXT 500 PRO system supplies the remaining power, up to its maximum combined output of 7.2 kW.
Previously, managing charging modes could sometimes be frustrating. If pure PV surplus charging was enabled and I forgot to disable it afterward in the Huawei app, charging simply wouldn’t start during bad weather or at night because no surplus power was available.
With the SunEnergyXT system, this problem is essentially eliminated. Charging now works exactly as I want it to.
If you’re wondering why I configured 7.5 kW instead of exactly 7.2 kW, I noticed that the wallbox typically operates slightly below its configured maximum value in real-world situations. Therefore, the slightly higher setting achieves the practical target output.
Simply plug in the EV and charge. The system automatically combines solar surplus and battery storage power without requiring constant switching between charging modes.
Three-Week Conclusion
After the first three weeks of operation, I am extremely satisfied with the system.
I now draw noticeably less electricity from the public grid because the battery system can directly supply our home’s energy demands with up to 7,200 watts of power.
At the same time, less solar energy is wasted because the system can charge via AC coupling with up to 7,200 watts. This greatly improves the utilization of excess solar production.
In fact, my current limitation is no longer charging or discharge power. It’s storage capacity.
On sunny days when neither of our EVs needs charging and several productive solar days occur in succession, the combined 15 kWh battery capacity of my three SunEnergyXT 500 PRO units fills up surprisingly quickly.
Even after discharging the batteries down to 10 percent, there are days when they become completely full long before all generated solar energy can be consumed by the house.
On particularly strong production days, I still lose between 10 and 20 kWh of energy that I would prefer to store for future EV charging.
For my current setup, adding two additional battery packs would therefore make perfect sense. Alternatively, upgrading the carport PV installation with a dedicated SunEnergyXT storage system would be another highly attractive option.
After all, every watt counts.
What I Particularly Like
- Fast response to changing household loads
- Excellent charging and discharge performance
- Flexible scalability
- Reliable AC coupling functionality
- Strong customer support
- Home Assistant integration options
- Active user community
- Long-term product strategy
One of the things I appreciate most is how quickly the system reacts when large consumers are switched on. Whether it’s a hair dryer, a Thermomix, a washing machine, or another appliance, the storage system responds rapidly to changing demand.
Home Assistant Integration
Another aspect I genuinely appreciate is the overall quality and appearance of the hardware itself. Of course, looks are subjective, but to me the units appear modern, premium, and well-built.
One of the next projects on my list is integrating the system into Home Assistant. As mentioned earlier, this is practically a requirement for me.
In fact, Home Assistant compatibility was one of the major reasons why I chose SunEnergyXT in the first place.
The company consistently supports smart home integration and offers local control options in addition to cloud-based management through its app.
Besides the official integration, there are also community-developed integrations available for users who want additional functionality.
Community and Product Strategy
Speaking of community, I really appreciate that there is an active and friendly SunEnergyXT user community where members help each other quickly and share real-world experiences.
Another important factor for me was the company’s long-term commitment to supporting its products.
Instead of releasing dozens of completely different storage systems every year, SunEnergyXT appears focused on continuously improving and maintaining its existing product portfolio.
Currently, the lineup consists of three primary storage systems:
- BK215 (first generation)
- BK215+ (improved successor)
- 500 Series (current generation)
Looking at previous generations, the BK215+ is still actively supported and remains available today. It continues to serve a valid purpose within the overall product lineup.
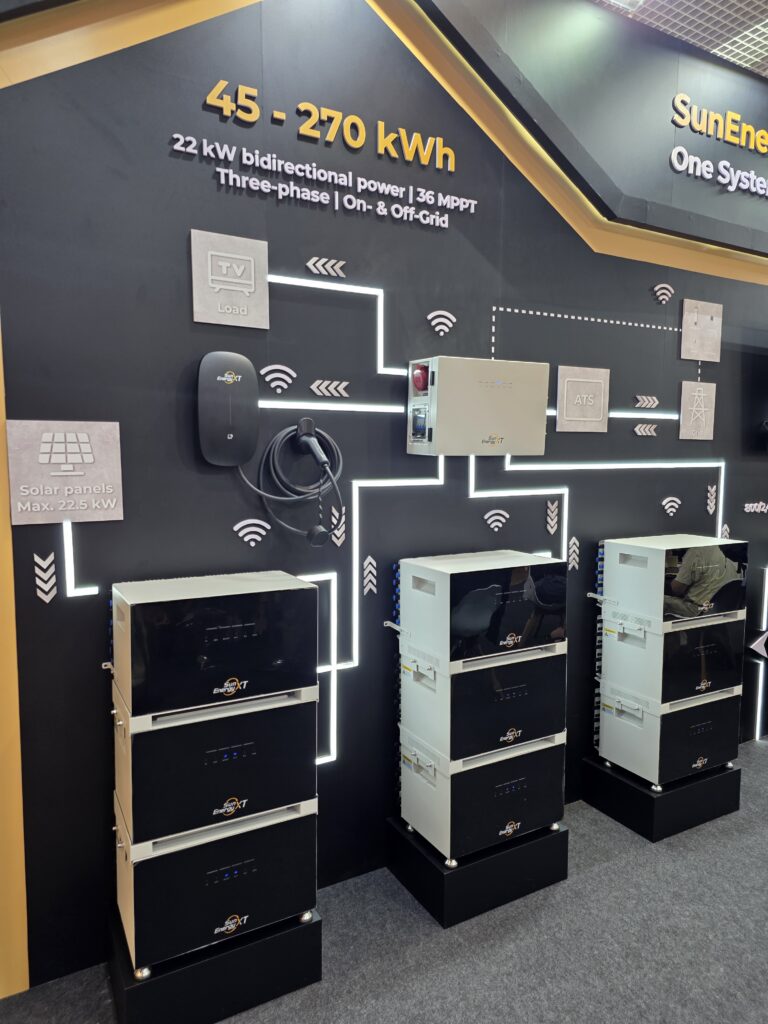
At Intersolar 2026, SunEnergyXT was still showcasing the BK215+ alongside the new 500 Series, demonstrating that older products are not simply abandoned when new models arrive.

Future Expansion Plans
In addition to the storage systems themselves, SunEnergyXT also offers a growing ecosystem of accessories.
One of the upcoming products announced at Intersolar was a new EV charging station. The company also showcased its SolarDrive Carport solution, which combines solar generation with integrated EV charging.
I personally think the SolarDrive Carport looks incredibly futuristic and could become a very attractive option for homeowners who want to combine parking, solar generation, and vehicle charging within one solution.
Final Verdict
Overall, the SunEnergyXT 500 PRO is an exceptionally flexible battery storage solution.
You can start with a single 5 kWh unit and expand each tower up to 30 kWh. If backup power or off-grid operation is important to you, the integrated backup outlet provides an additional level of security.
And even 30 kWh is far from the end of the road.
As demonstrated at Intersolar 2026, future expansion options include combining multiple towers through the upcoming PowerBox system. According to SunEnergyXT’s roadmap at the time of writing, up to three groups of three storage towers could potentially be distributed across all three phases of a household electrical system.
That would result in a storage capacity of up to 270 kWh and a total system output of up to 21.6 kW, making the platform increasingly attractive for large homes, EV charging, and heat pump applications.
Considering our two electric vehicles, this is definitely something I will be watching closely once the solution becomes available.
If I could wish for one additional feature, it would be a consolidated dashboard for the Smart Multi-Area Strategy that displays the combined charging and discharge power of all connected devices on a single screen, without having to switch between individual areas.
The SunEnergyXT 500 PRO combines impressive scalability, strong performance, excellent flexibility, and a clear long-term ecosystem strategy.
Follow My Solar Journey
I will continue sharing updates from my solar journey and, as always, look forward to your comments and questions.
You can also find videos and additional impressions of the system on my Instagram channel:
Chris (@zweifachpapa.de) on Instagram
See you next time,
Chris

You May Also Like
Details on the Solarflow balcony power plant storage system
Balcony power station Solarflow from Zendure